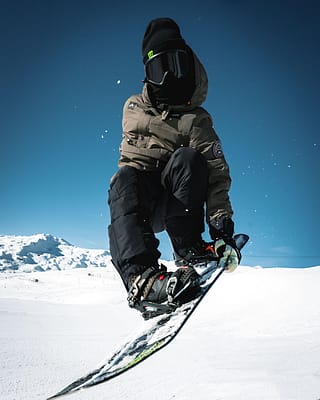
How to rotate on a snowboard – Trick tip
In this instalment of trick tips, we are talking rotations on a snowboard. Being able to rotate tricks on a snowboard is probably the ultimate goal. It's the next step up from learning to jump and takes your skillset to the next level.

Rotating on a snowboard is a pretty amazing feeling. Not only does it look stylish and super slick, but it's maybe the closest thing we can get to flying. It also opens you up to a whole world of tricks, from jibbing to air & style. You can rotate in the park, in the powder or just on the slopes.
Besides technique, it is super important, that you are equipped with the right gear when challenging yourself in the park. Snowboard jackets and snowboard pants with high levels of waterproofness and high breathability will keep your bum dry when trying out new tricks (believe me, you need it – I’ve been there). Other than that, you should always wear a helmet and a back protector when cruising through the park. Your brain and your spine are irreplaceable, and the impacts on park jumps can be pretty heavy.

Let's go - Trick tip time!
Now that we briefly covered the safety aspects of parkriding, it is time for the fun part: Rotations. Rotations are very technical – that is why this trick tip will help you to understand the mechanisms and body movements behind rotating on a snowboard. Like always, we put together this trick tip with the help of our wonderful friends over at snowboard-addiction.com. This weeks’ trick tip will be divided into the two most common ways of rotations: Frontside rotations and Backside rotations. And off we go!
Frontside rotations
Frontside rotations are probably the easiest rotations to do on a snowboard. Whoever wants to start their rotation career, it mostly kicks off with the infamous Frontside 180. The Frontside 180 (in my eyes) is one of the most underrated tricks in snowboarding, even though it has been winning back popularity through some of the old style masters of snowboarding (Gigi Rüf, Nicolas Müller, Travis Rice).
To build confidence, start by practicing frontside 180s on flat ground or gentle slopes. This allows you to focus on the mechanics of initiating the spin with your shoulders and arms while keeping your core engaged. Once you’ve mastered the movement on flat terrain, try it on small side hits or rollers to simulate jump takeoff. This step-by-step approach will help you develop muscle memory and reduce the risk of mistakes when attempting it off larger jumps.
When rotating off a jump, the biggest difference is that you will need to use the edges of your board. The approach towards the jump is the same as in our second trick tip on how to jump on a snowboard. Straight-line from wherever you feel comfortable and set up your rotation just before the jump. For a frontside rotation, do one smooth toe edge turn just before the jump. This will help you to get more pressure on your heel edge when spinning off the jump. Transition to your heel edge just before you reach the lip of the jump and pop off your heel edge to initiate the rotation. To help your body with the movement and add extra momentum to your rotation, try winding up and releasing your arms and upper body in the direction of the rotation when jumping. The more you pop off the jump, the easier it will be to keep the momentum of the rotation going in the air. When doing frontside 180s, you will land switch so make sure you feel comfortable with that. All frontside rotations (360, 540, 720, …) begin with the same basic movement. You can add extra rotations by spinning faster out of your shoulders and arms and of course by hitting bigger jumps and having more time in the air.
Backside rotations
To prepare for backside 180s, practice spinning 90° to 180° on gentle slopes. Start by riding on your toe edge and initiating a smooth spin by looking over your leading shoulder. The key is to maintain balance and control through the rotation. Progress to stationary drills, where you simulate the spin using your upper body and core to guide the movement. These exercises are invaluable for improving control and confidence, especially when transitioning to jumps.
Now it is time to rotate into the other direction. Backside rotations (my favourites) feel great in the air but need a bit more control in the air because you will have to land blind. Backside 180s are super stylish and should be part of every snowboarders’ trick repertoire. To practice backside 180, you can start by trying out some easy spins on the slope. Ride down the slopes and spin around 180 degrees on your toe edge while your back is facing down the hill. This is the feeling you will have to get used to when doing backside 180s. The blind landing can mess with your head when you first do it but backside 180s are all about the feeling.
Once you feel comfortable, spinning your board backward on the slopes and doing backside 180s off little knuckles or side hits, try to apply all the lessons learned to a small park jump. Backside rotations work exactly the opposite way as frontside rotations. To rotate backside, you take off from your toe edge and land blind catching the landing with your heel edge. You start off the jump with one smooth heel edge turn and change to the toe edge just before the lip of the jump. Once you reached the lip, you pop off your toe edge and engage the rotation by winding up and support the movement with your arms and your upper body. Try to look back up to the jump to avoid over rotations. It will take a while to get used to landing blind but once you got it dialed you will enjoy the feels of it. Once you learned backside 180s, you can up your game and keep spinning further by adding more rotations to your tricks. Backside 360s feel a bit easier because you just add one rotation while not having to land blind. However, backside spins are super fun and look the best when adding that extra amount of pop when hitting the lip.
Common mistakes and how to fix them
Even with practice, rotations can be tricky. Over-rotating is one of the most common issues, often caused by too much force in the initial spin. To avoid this, focus on initiating the movement with your shoulders and allowing your lower body to follow naturally. Landing on the wrong edge can also throw you off balance; for frontside rotations, ensure you land on your toe edge, and for backside, catch the landing on your heel edge. Lastly, remember to commit fully to the trick—half-hearted attempts often lead to falls.
Visualization and mental preparation
Rotations are as much mental as they are physical. Before attempting a spin, visualize the entire movement—from the approach to the landing. Picture your body position, the rotation, and where you’ll spot the landing. Mental rehearsals can improve your muscle memory and give you a confidence boost. Additionally, staying calm and committing fully to the spin is critical. Hesitation mid-air often leads to incomplete rotations or falls.
Lines
To give you a feeling of how rotations are executed by pros like Ståle Sandbech, take a look at this creative flick of the super talented Norwegian and his friend Spenny also known as Gimbal God. The outcome is this masterpiece: LINES with Ståle Sandbech. It almost feels like flying – right?
“Spotting your landing is absolutely the best advice I can give. Oh and visualisation. When I first started small rotations I watched a bunch of your tube vids then tried to imagine myself doing my first 360. I imagined the in-run, then leaving the kicker and ensuring a whip my head around and spot my landing. If you can see yourself do it, you can do it. Don’t be afraid to fail either, you will for sure catch an edge and end up with a few bumps but its worth it, once you’ve nailed it, it opens up a whole world of possibilities.“
And that was it folks. Another week, another trick tip in the books. We hope you enjoyed it as much as we did and make sure to check out our last weeks’ trick tip on: How to Jump on a Snowboard (just in case you missed it). Last weeks’ trick tip can help you improve your jumping techniques and will give useful hints on how to add hight and style to your jumps. Stay Safe out there and see you next week for our trick tip on: How to jib on a snowboard. Peace and love!
Check out more of our unique snowboard styles here!

