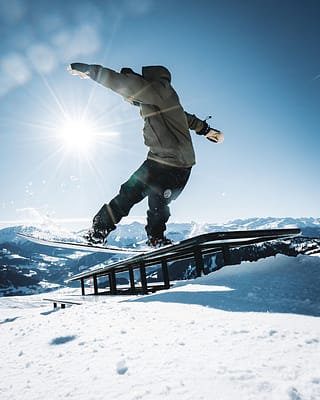
Trick tip: How to jib on a snowboard
In this instalment of trick tips, we explore one of the most playful things to do on a snowboard: Jibbing. But what is Jibbing? Let's find out why this skill is so fun to master and how it can totally change your riding experience.

Jibbing refers to sliding over obstacles like rails or boxes on a snowboard, blending balance, creativity, and style. Whether you're riding in the park or hitting the streets, jibbing opens up a world of possibilities for new tricks and progression.
Safety Tip: Always wear a helmet and protective gear when practicing, especially on new or more challenging obstacles. Start with simple features and gradually increase difficulty as your confidence grows.
Jibbing, which has its roots in skateboarding, is all about performing tricks on features like rails, boxes, and other obstacles. It's a cornerstone of freestyle snowboarding, offering endless opportunities for creativity. Whether you're just starting out or looking to refine your skills, understanding the fundamentals of jibbing is essential.
Before diving into tricks, ensure you’re equipped with proper safety gear, including a helmet and wrist guards. Start small and progress as your confidence grows.

The royal discipline of jibbing is definitely bringing all your skills out to the streets. When jibbing the streets, make sure to wear the best snowboarding jackets and snowboard pants that you can find – because people will look at you! The kings of street jibbing mostly come from cities up north, where there is loads of snow in the winter but not a lot of resorts to try out your skills. Street Snowboarding requires a lot of ability on your snowboard but opens up a whole new canvas for your creativity. Sebastian Toutant (better known as Seb Toots) is one of those hyper-talented snowboarders who can bring their park riding to the cold streets of Quebec. If we talk reality, no one of us will ever be as badass as him but the least we can do is try by learning the basics of jibbing and by getting some inspirational ideas of this king of street snowboarding.
Basics of jibbing
So let us dive straight into the basics of this park riding discipline. Basically, there are two main obstacles you can tackle in the park when applying your jib skills: Boxes and Rails. There is a huge variety of different jib obstacles but in this trick tip, we are going to concentrate on the most common ones. Boxes are the ones you want to start with and once you feel comfortable on boxes you can bring your game to rails, which are much thinner and harder to ride. With the help of our friends at snowboard-addiction.com we created a trick tip on: How to Jib on a Snowboard. We broke it down into the first steps when jibbing on a snowboard, followed by two tricks you can learn quite fast when riding boxes and rails.
To master the basics, focus on your approach, balance, and body positioning. Always keep your board flat and avoid engaging the edges when sliding. Approach the feature at a moderate speed—too fast can throw you off balance, while too slow might cause you to stall.
If you’re new to jibbing, start by practicing on flat ground. Draw a box in the snow and slide over it to simulate the movement. This will help you get used to keeping your weight centered and maintaining control. Once comfortable, progress to wider, lower boxes before attempting narrower or more technical features.
How to 50-50 on a snowboard
The first thing you want to learn, when jibbing on a snowboard is a 50-50. A 50-50 refers to the position your snowboard is having when sliding down the box. During a 50-50 your board is parallel to the obstacle you are riding. Start off by drawing a square into the snow that looks like a box, and try sliding over it with your base flat on the snow. It is exactly that feeling that you will have to copy when riding your first box. Find an easy box to start with. It should be a relatively wide box, close to the ground, flat, and with a ride on so you won’t have to jump onto it. When riding the box, try to keep your body weight over the board at all times so your base stays flat on the box. Challenge yourself by bringing your 50-50s to longer or narrower boxes, and try not to catch an edge! Practice is the recipe for success here. Once you feel comfortable with various obstacles, it is time for the next step!
When approaching the box, keep your eyes focused on the end of the feature. Your knees should be slightly bent, and your weight evenly distributed over the board. Ride onto the box with your base flat and shoulders aligned with the obstacle.
As you slide, avoid leaning back or forward too much, as this can cause you to lose balance. Instead, keep your weight centered and your movements controlled. When exiting the box, gently shift your weight back to your board’s tail to ensure a clean dismount.
Troubleshooting Tips:
- If you’re slipping off the box, check that your board is flat and you’re not engaging an edge.
- If your balance feels off, try widening your stance for better stability.
How to boardslide on a snowboard
A boardslide on a snowboard is probably one of the most versatile tricks you can do. There are two main types of boardslides to explore: the frontside boardslide, where your chest faces the obstacle, and the backside boardslide, where your back faces the obstacle. Each offers unique challenges and opportunities for style, so practicing both is key to mastering this trick. There are so many different forms of board slides that I can promise you that you won’t get bored with them very soon. When boardsliding, your board should be perpendicular to the obstacle. You can start by riding onto the box in a 50-50 position and shuffle into a boardslide position. To maintain stability during a boardslide, focus on counter-rotation. Begin by rotating your upper body toward the boardslide position as your board slides into alignment. Then, counter-rotate your arms and shoulders back parallel to the obstacle to stay balanced. Keep your weight centered over the board to prevent slipping out, and always look toward the end of the feature to maintain control. The most important body movement when boardsliding on a snowboard is counter-rotation. Counter-rotation means that your arms and your board rotate in opposite directions during the boardslide. You initiate the movement by rotating your arms into the position of the boardslide. Once you slide your board into the boardslide position, rotate your arms back into a parallel position to the obstacle. Like that, it will be easier for you to keep the balance. When doing a backside boardslide, the body weight should be right over the center of your bindings. There are different forms of boardslides where your center of gravity will be on a different part of the board (for example, tailslide = weight over the tail, noseslide = weight over the nose, …). Like I said, there are literally one million options.
Once you’re comfortable with boardslides on basic features like boxes, challenge yourself by progressing to narrower rails. Experiment with different variations, such as noseslides and tailslides, by shifting your weight onto the respective part of the board. Adding tweaks or grabs can also elevate your style and make your boardslides stand out.
How to 50-50 backside 180
This is why I decided to add a little extra trick to try out at the end of this trick tip. A trick that combines our trick tip on how to rotate on a snowboard with this week’s trick tip on jibbing. By adding a rotation to the end of your 50-50, you will be able to up your 50-50 game and add a bit of difficulty whenever you feel like it. Use counter-rotation to initiate the backside 180 off the obstacle. The only difference to rotating on a jump is that you can’t use your edges when jumping off a box or rail. The momentum you have to create for the rotation has to come only from a combination of popping off the box and counter-rotation of your arms.

Progression path for jibbing
After mastering foundational tricks like the 50-50 and boardslide, the next step is to explore more advanced jibbing techniques. Start by focusing on precision-based maneuvers such as nose presses and tail presses. These tricks require you to balance on the nose or tail of your board while sliding, which greatly improves your control and stability.
Once you’re comfortable with presses, try incorporating rotations into your jibbing. For example, adding a frontside or backside 180 as you exit a box or rail introduces a dynamic element to your riding. Timing and body positioning are key, so practice on flat ground before attempting these tricks on features.
For those looking to step it up even further, attempt spinning into features. Performing a 270-degree spin to land directly into a boardslide or similar position requires a combination of precision, speed, and confidence. This trick is a significant milestone in jibbing progression and can open the door to more creative combinations.
Don’t forget to practice your switch stance. Becoming comfortable riding and jibbing in your non-dominant stance will make you a more versatile rider. Lastly, start experimenting with trick combinations, such as a nose press into a 180 out, to develop your flow and style.
Progressing in jibbing takes patience and a commitment to consistent practice. Start small, build your confidence, and always prioritize safety by wearing the proper protective gear and inspecting features before use.
And that’s a wrap again. If you followed our weekly trick tips, you are now able to carve, jump, rotate and jib on a snowboard. Pretty solid, hey? Sounds like we raised a future pro rider already. But what is missing now? Right. Last but not least we will introduce you to the most dreamy thing that snowboarding has to offer: Riding powder on a snowboard. Riding powder on a snowboard is the ultimate feeling (and very close to the feeling of riding a wave on a surfboard). That is why we saved the best for the last. So stay tuned and don’t miss out on next weeks’ trick tip! Until then and see yas later!
Check out more of our unique snowboard styles here!
